Saturday, February 26, 2011

Commod Whip Cream!

I grew up on fresh, raw cows milk.  My Grandpa had a cow named Beemer that we milked a couple times a week and I have fond memories of going with my Dad to milk the cow then enjoying the thick creamy milk at home.  When I was 6 years old, Beemer jumped the fence in the pasture and got hit by a car.  That was the end of the fresh cows milk era for our family.  The rest of my growing up we drank powdered dry milk and canned milk because it is what we could afford!
This recipe for whip cream is one that we made frequently in my household growing up.  It is simple, cheap and quite tasty!

Commod Whip Cream:
1 can Evaporated Milk
Sweetener of choice (ie. Sugar, honey, Splenda, etc)
Dash of vanilla


-Place a can of evaporated milk in the freezer for 1.5 to 2 hours to chill.  You want the milk to be on the brink of freezing, but not frozen.


-Pour chilled milk in a large bowl and beat with electric mixer on high.  When mixture is foamy, slowly add in sweetener of choice and vanilla and continue to beat until stiff peaks form.


-Taste whip cream and add more sweetener if needed.  Serve immediately.  Whip cream deflates quickly so enjoy it right after beating!


Time For a Refill

Hello again!  I have been negligent in positing lately as I have been traveling for work and busy with projects.  Last Wednesday marked one month since I started this project and our commods items were running low.  We have been eating mostly dinners from commods which is why we had extra products left over.  Had we been eating all three meals and day we would have run out weeks ago!  Here is a reminder of what it looked like in the beginning:


Here's what we have left:

 It's crazy to me that the 5 lb brick of cheese is meant for 1 person.  Between the three of us we only used half of it!  We got our refill of commods last Wednesday and there are more great recipes to come.  Stay tuned!


Tuesday, February 15, 2011

Sweetheart Salad

Yesterday was Valentine's Day and I wanted to make something special.  I looked at our commods shelf and tried to think of something fancy to make.  It's almost been a month since we got commods and there is very little to choose from, but I had everything I needed to throw together a quick and easy side salad.

This salad is great because you can add ANYTHING you may have lying around (except the kitchen sink, of course) and it is still delicious!  I made it by combining the following ingredients:

Cooked and cooled pasta (I  used spaghetti noodles, you can use any shape you have!)
Kidney beans
Olives
Avocado
Broccoli
Pepperoni Slices
Fat free Italian dressing

Combine all ingredients in a bowl and toss together.  I like to start by adding a small amount of Italian dressing then tasting it to see if it needs more.  You can add more or less items than I did, anything goes!

Chill the salad for a few hours before serving.  You will need to add more Italian dressing  just before serving as the noodles will soak up some of the dressing as it chills.

Be creative and enjoy!

Thursday, February 10, 2011

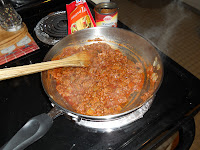
Sloppy Joes

Sloppy joes hold a special place in my heart.  We grew up on deer meat and I always looked forward to sloppy joe night where the usually tasteless deer burger would be transformed into a flavorful sandwich!  In my teenage years I discovered that most people make their sloppy joes with ground beef and the first time I tasted this variety I was hooked.  I haven't had a deer meat sloppy joe since!
Tonights recipe is time tested in my house.  The boys love these sloppy joes and have no idea that I have added spinach and beans to the sauce to sneak in some extra vegetables and fiber!


Sloppy Joes
Serves 6-8

1 lb ground beef
1 small can tomato sauce
1 packet sloppy joe mix
1 can kidney beans drained and rinsed
1/2 an onion, diced
Garlic powder, onion powder, paprika, cumin


 -Brown beef with diced onions. Drain fat.


-Place entire can of tomato sauce, 1/2 can of kidney beans, 1/4 cup of water and about 1 cup spinach in blender and puree until smooth.  Add more water if mixture is too thick.


- Add pureed sauce to cooked meat.  You'll notice the sauce is an un-appetizing green color at this point, but don't worry, the green will fade as you add more ingredients.
 -Add packet of sloppy joe mix.
-Add about 1 TB of paprika.  This is to put some red coloring back in the mix and add a little flavor.  If you don't have any paprika, you can add a squirt of ketchup to redden it up a bit.


-Taste the sauce and add garlic, onion or cumin powder as desired.


-Serve on a hamburger bun and enjoy!


Sunday, February 6, 2011

Low Carb Potato Salad

It's Super Bowl Sunday and nothing says tailgate party like potato salad.  Who doesn't love this delicious all American side dish?  The bad news is, for those with blood sugar control issues, this salad does not give much love back.  Potatoes are high in starch and can lead to blood sugar spikes so today I created an alternative salad that is low carb and just as delicious using cauliflower instead of potatoes!


That's right, Cauliflower!  I made this using this low fat potato salad recipe from a previous post, but replaced the potatoes with cauliflower.  You'll want to remove the cauliflower from the stems so it's just the florets then steam them for 3-5 minutes until just tender.  Allow them to cool then mix the salad together as if you were using potatoes.

To me it tasted just like the real thing without any guilt or blood sugar woes afterward!  Looks like a winner!

Saturday, February 5, 2011

Frosted Banana Bars

As a disclaimer: there is absolutely nothing healthy about today's recipe.  Yes these bars have bananas in them, but added to that is flour, sugar, and oil which is then smothered in cream cheese frosting.   But they are oh so delicious!  I am a firm believer in enjoying a treat every now and then and with the super bowl coming up my husband requested these bars for his party. 


My sister introduced me to this recipe years ago and it has been a fan favorite ever since.  These bars are fast and easy to make and they produce a giant pan of bars.  Another plus is that they freeze perfectly so you can make several pans ahead of time to have handy at a moment's notice.

Frosted Banana Bars

1/2 cup oil
2 cups sugar
3 eggs
1 1/2 cups mashed bananas (about 3 ripe bananas)
1 tsp. vanilla
2 cups flour
1 tsp. baking soda
1/4 tsp. salt

Frosting:
1/2 cup butter at room temperature
8 oz. cream cheese at room temperature
4 cups powdered sugar
2 tsp. vanilla

-Mash bananas in bowl then add oil, sugar, eggs, and vanilla and mix until smooth.  Add dry ingredients and stir.  Pour batter into greased 15x10x1 jelly roll pan (or cookie sheet) and bake at 350 degrees for 20-25 minutes.
-To make frosting combine butter and powdered sugar in bowl and mix with beaters until fluffy.  Add vanilla and powdered sugar and blend until smooth.  Cool banana bars before frosting and keep frosted bars in the fridge.

I'm Back With a Time Saving Tip!

It's been a week since the knife incident and my thumb is healing nicely!  We have continued to eat from our commods this past week, but my husband threw most of the meals together so I don't have any new recipes.  Now that the thumb is back in action you can expect a full return! 

And now for a time saving tip:

I made lasagna the other night.  I don't do anything fancy with my recipe, just the usual ground beef, cheese, cottage cheese, noodles, pasta sauce and seasonings.  I like to throw in whatever vegetables I have on hand which happened to be spinach this time.
Lasagna can be rather time consuming to make, but it feeds a lot of people, my family loves it, and we usually have leftovers for lunch the next day.  Tonight I doubled the recipe and made two pans: one to eat tonight and the other to freeze.

Wrap the lasagna to be frozen with plastic wrap, pressing the wrap against the sauce to squeeze out any air.


Cover the plastic layer with foil and label it, date it with the current date then post a use by date.  The lasagna noodles I used said they would last 2 months in the freezer, but they were the no-cook noodles and have a far shorter freezer life than regular noodles.  In general anything that is frozen should be used within 6 months, but check the package of the items you're putting in the dish to see if it notes any differences in freeze time.

When you remove the lasagna from the freezer to bake it, don't forget to remove the plastic wrap layer before putting it in the oven!  I'll sometimes write myself a note on the foil so I don't forget!

So there you have it, two for one dinner.  I made this from commod ingredients except for the cottage cheese and noodles which cost me $4 for the both of them.  That means I got two dinners for $2 a piece!  Steal of a deal!

Friday, January 28, 2011

Looks Like Left Overs For a While....

I had a little mishap tonight involving a sharp knife and my thumb in which I nearly took off the tip of my thumb!  Luckily the Dr. was able to glue me back together, but I'm not supposed to get my thumb wet or use it too much for 5 days.  I'll be taking a break from cooking for the weekend, and return in full force next week.  Until then, they boys will get left overs! 

Thursday, January 27, 2011

Real Men Eat Quiche!

"Real men eat quiche."  That's what my Dad always says. 
I decided to make some quiche for the real men in my house for dinner tonight.  I took the mashed potato crust idea from the taco pie I made the other night and adjusted it to fit this recipe. The result was a delicious quiche that my husband said tasted like a baked potato covered in broccoli and cheese!

 Quiche with Potato Flake Crust
-Serves 6-8

Crust:
2 Tb. Butter or oil
2/3 cup Milk
2 1/4 cups Mashed Potato Flakes

Basic Quiche:
4 Eggs
1 1/2 cups Milk
1 cup Shredded Cheese
Seasonings of choice: onion powder, garlic powder, salt, pepper, parsley flakes, etc.


 -Melt butter in saucepan.  Remove from heat and stir in milk.  Measure potato flakes in bowl and pour milk over the top.  Stir mixture to combine until it resembles oatmeal.

-Sprinkle mixture with garlic and onion powders. (optional)


-Press mixture into a greased 9" pie pan so it resembles a crust.


 -Whisk eggs and milk together.  Add salt, pepper and seasonings of choice.  Stir in cheese.

-Pour egg and cheese mixture into crust.  You can bake it like this for a basic cheese quiche or you can add meat or vegetables of your choosing.  I added crumbled bacon and broccoli to this quiche.


-Bake at 350 degrees for 45-55 minutes until center of quiche is set and doesn't jiggle when moved.


-Remove from oven and allow to sit for 10 minutes before cutting.


Enjoy!

Wednesday, January 26, 2011

Cheesy Chicken Pot Pie Pockets

 I was feeling inspired tonight and had fun creating this recipe.  It turned out fabulously and got rave reviews from the boys!

The pot pies were easy to make and made plenty of left overs for lunch tomorrow which is an extra bonus!  I made the same dough as I did for the cheeseburger pizza, adding pureed beans to up the fiber content.  Here is the recipe:

Cheesy Chicken Pot Pies
-Makes 12

-3 3/4 cup low fat bakery mix
1 1/2 cup white beans
3/4 cup water

1 can chicken breast (or cooked diced chicken)
1 can mixed vegetables
2 - 2 1/2 cups shredded cheese

Seasonings: garlic powder, onion powder, poultry seasoning, salt, pepper, parsley, etc.


-combine beans and water in blender and blend until smooth

-Measure baking mix into bowl.  Reserve 1/3 cup of bean puree in measuring cup and set aside. Pour remaining beans into mix and stir together.  Sprinkle dough with garlic and onion powder, poultry seasoning and parsley flakes.


-Dust countertop and dough with baking mix or flour and roll dough out to about 1/8 inch thick.


-In bowl combine canned vegetables, chicken and cheese.  Sprinkle mixture with garlic and onion powders, poultry seasoning and any other spices of choice.  Add remaining bean puree and stir to combine all ingredients.


-Cut dough into squares and fill each square with chicken mixture.  Fold dough squares in half and press down edges to seal pocket. 


-Place pockets on greased baking sheet.


-Mix 1 egg white with 1 TB of water and brush on top of pockets.  This step is optional, but produces a crunchier top crust if brushed.


-Cut slits in the top of each pocket for venting.  Bake pockets at 425 degrees for 20-25 minutes until gold brown.


For dessert we had a can of fruit cocktail that I fancied up a bit by adding fresh apple and orange slices.

Enjoy!

Tuesday, January 25, 2011

Taco Pie with Potato Crust

Picture borrowed from here

Tonight's dinner is adapted from a recipe I found many years ago in the newspaper.  The picture looked so good and I couldn't believe the crust was made from potato flakes so I clipped it out and it has been sitting in my cookbook ever since.  I've been meaning to make it for a very long time and tonight was the night!

Taco Pie with Potato Flake Crust
-serves 6-8

2 Tb. Butter
2/3 cup Milk
2 1/4 cups Mashed Potato Flakes

1 lb ground beef
1/2 cup diced onion
1 package Taco Seasoning
1/2 cup Tomato Paste (or tomato soup)

Shredded cheese
Shredded lettuce
Taco Toppings: salsa, guacamole, olives, onions, etc.


 -Melt butter in sauce pan and remove from heat.  Add milk and whisk in 2 Tb of dry taco mix.


-Stir dry mashed potato flakes into milk.  Mixture should be moist, not wet, and look something like oatmeal.


-Press mixture into the bottom of a greased pie pan.


-Brown ground beef and onions and drain fat.  Add remaining taco seasoning and 1/2 cup of tomato sauce.
-Spoon beef mixture into prepared potato crust and bake uncovered at 350 degrees for 30-35 minutes until crust is brown around the edges.
-Removed from oven and add shredded cheese to top while pie is still hot.
-Let pie sit for 5 minutes allowing cheese to melt (you may need to return the pie to oven for a few minutes to help the cheese melt)
-Add toppings just before serving so lettuce won't wilt with heat.  I let each person add their own toppings since not everyone likes sour cream or salsa.   
Enjoy!